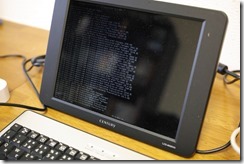
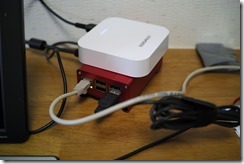
大したコンテンツもないのにxeon搭載の大そうな自宅サーバーを節電の意味でもRaspberryPi(以下ラズパイ)化することにした。
ラズパイ化するに当たって所有している既存の旧機種を使用するか新しいタイプのものを使用するか迷ったが、WordPressがある程度快適に動くことを考慮してスペックアップした新機種(Raspberry Pi 2 Model B)を使用することにした。
大体性能的には旧機種の6倍早いらしいので貧相でみすぼらしい私のwebページ程度でしたらサクサク配信できるものと思います。
ただ現在の自宅サーバーはwebサーバーとしての働きより仮想化を使用した開発用のデバッグ環境にありますので引き続き使用することになりそうです。
(電源入れたり切ったりが面倒になりそう。)
新たに準備したもの
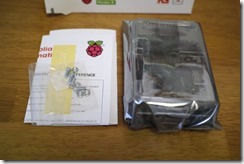
と言うわけで今回購入したものはこれ。
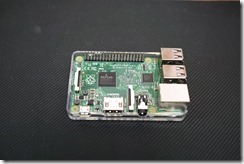
- Raspberry Pi 2 Model B本体
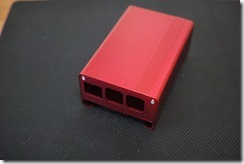
なぜかケース付きのほうが安いのでそれをチョイス。 - 専用アルミケース。
年中電源ONなので、まさかの発火時にアクリルケースでは不安です。 - SDカード 64GB
ちょっとしたデジカメ写真ギャラリー程度は置くかもなのである程度の容量を準備。
いつも購入しているトランセンド社のものにしました。
[amazonjs asin=”B00TBKFAI2″ locale=”JP” title=”Raspberry Pi2 Model B ボード&ケースセット (Standard, Clear)-Physical Computing Lab”]
現行のモデルはmicroSDを採用している。
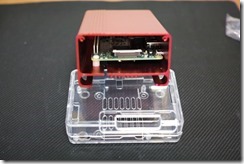
このアルミケースにRsapberryPi2を取り付けるとmicroSDへのアクセスは手軽には出来なくなる。
[amazonjs asin=”B018LPWYUO” locale=”JP” title=”UEB ラズベリーパイ2 アルミケース ボックス 金属シェル 超小型パソコンRaspberry Pi 2 Model B/Raspberry Pi B+専用保護ケース カバー ファンを含めない (ブラック)”]
RaspberryPiサーバーで何をする?
現在の自宅サーバーのような容量を活かしたowncloudやclipbucketなどは64GBのマイクロSDでは無理なのでまずは以下の3つを構築しサーバー移転をする。
- Webサーバー
WordPressを使用するのでmysqlも。 - メールサーバー
- メンテ用のsshサーバー
OSのインストールと初めにやった設定
以前、RaspberryPiでやったのと同様にRaspbianというOSをインストールするつもりでいたが現在はubuntuも動かせるらしく今回は慣れたubuntuで行こうかと思います。
導入自体は現在はNOOBSというものがあるようですがubuntuの場合は以前と同様にイメージファイルをSDカードに焼きます。
イメージの入手先
https://wiki.ubuntu.com/ARM/RaspberryPi
から
Download 2015-04-06-ubuntu-trusty.zip
を入手します。
Win32Disk imagerやDDWinなどを使用してイメージファイルをマイクロSDへ書き込みます。
書き込みが完了したらRaspberryPi2に取り付け、あっという間にubuntuが起動。
私の場合はCUIで使用するのでこのまま、あとは必要なパッケージ類を導入するだけ。
とりあえずイメージ配布元のマニュアル通りにパーティションを拡大。
導入直後
~$ df
Filesystem 1K-blocks Used Available Use% Mounted on
/dev/root 1707856 642124 960928 41% /
devtmpfs 468772 4 468768 1% /dev
none 4 0 4 0% /sys/fs/cgroup
none 94612 260 94352 1% /run
none 5120 0 5120 0% /run/lock
none 473052 0 473052 0% /run/shm
none 102400 0 102400 0% /run/user
/dev/mmcblk0p1 65390 19800 45590 31% /boot/firmware
ん、swapが無い?
まぁswap使用しない予定だったので問題ない。
fastabは
~$ cat /etc/fstab
proc /proc proc defaults 0 0
/dev/mmcblk0p2 / ext4 defaults,noatime 0 1
/dev/mmcblk0p1 /boot/firmware vfat defaults 0 2
な感じ。
~$ sudo fdisk /dev/mmcblk0
[sudo] password for ubuntu:Command (m for help): d
Partition number (1-4): 2Command (m for help): n
Partition type:
p primary (1 primary, 0 extended, 3 free)
e extended
Select (default p): p
Partition number (1-4, default 2): 2
First sector (133120-125958143, default 133120):
Using default value 133120
Last sector, +sectors or +size{K,M,G} (133120-125958143, default 125958143):
Using default value 125958143Command (m for help): w
The partition table has been altered!Calling ioctl() to re-read partition table.
WARNING: Re-reading the partition table failed with error 16: Device or resource busy.
The kernel still uses the old table. The new table will be used at
the next reboot or after you run partprobe(8) or kpartx(8)
Syncing disks.
ここで一旦リブート
~$ sudo reboot
パーティションサイズをSDカードの上限まで拡張する。
~$ sudo resize2fs /dev/mmcblk0p2
[sudo] password for ubuntu:
resize2fs 1.42.9 (4-Feb-2014)
Filesystem at /dev/mmcblk0p2 is mounted on /; on-line resizing required
old_desc_blocks = 1, new_desc_blocks = 4
The filesystem on /dev/mmcblk0p2 is now 15728128 blocks long.
パーティションが拡張されたか確認
~$ df
Filesystem 1K-blocks Used Available Use% Mounted on
/dev/root 61927164 645200 58734120 2% /
devtmpfs 468772 4 468768 1% /dev
none 4 0 4 0% /sys/fs/cgroup
none 94612 260 94352 1% /run
none 5120 0 5120 0% /run/lock
none 473052 0 473052 0% /run/shm
none 102400 0 102400 0% /run/user
/dev/mmcblk0p1 65390 19800 45590 31% /boot/firmware
ルートディレクトリ(/)が無事拡張され64GBのマイクロSDを目いっぱい使用できるようになりました。
次にパッケージを最新に更新
~$ apt-get update
~$ apt-get dist-upgrade
でパッケージを更新
このままではリモートで操作できないのsshサーバーを導入
それとipアドレスがDHCPになっているので固定化します。
openssh-serverのインストール
基本私の場合ラズパイはリモート操作で行うのでSSHでログインできるようにsshサーバーを入れる
~$ apt-get install openssh-server
ip address固定
~$ vi /etc/network/interfaces
# interfaces(5) file used by ifup(8) and ifdown(8)
# Include files from /etc/network/interfaces.d:
source-directory /etc/network/interfaces.d# The loopback network interface
auto lo
iface lo inet loopback# The primary network interface
allow-hotplug eth0
iface eth0 inet dhcp
を
# interfaces(5) file used by ifup(8) and ifdown(8)
# Include files from /etc/network/interfaces.d:
source-directory /etc/network/interfaces.d# The loopback network interface
auto lo
iface lo inet loopback# The primary network interface
#allow-hotplug eth0
#iface eth0 inet dhcp
auto eth0
iface eth0 inet static
address 192.168.10.150
network 192.168.10.0
netmask 255.255.255.0
broadcast 192.168.10.255
gateway 192.168.10.1
dns-nameservers 192.168.10.1
のように修正
(ipアドレスは環境に合わせてください。)
タイムゾーン等変更
ここでタイムゾーンがUTCになっていることに気が付いたので修正
$ echo “Asia/Tokyo” | sudo tee /etc/timezone
Asia/Tokyo~$ sudo dpkg-reconfigure -f noninteractive tzdata
Current default time zone: ‘Asia/Tokyo’
Local time is now: Tue Jan 5 14:19:09 JST 2016.
Universal Time is now: Tue Jan 5 05:19:09 UTC 2016.~$ sudo locale-gen ja_JP.UTF-8
Generating locales…
ja_JP.UTF-8… done
Generation complete.~$ sudo dpkg-reconfigure -f noninteractive locales
Generating locales…
en_AG.UTF-8… done
en_AU.UTF-8… done
en_BW.UTF-8… done
en_CA.UTF-8… done
en_DK.UTF-8… done
en_GB.UTF-8… done
en_HK.UTF-8… done
en_IE.UTF-8… done
en_IN.UTF-8… done
en_NG.UTF-8… done
en_NZ.UTF-8… done
en_PH.UTF-8… done
en_SG.UTF-8… done
en_US.UTF-8… done
en_ZA.UTF-8… done
en_ZM.UTF-8… done
en_ZW.UTF-8… done
ja_JP.UTF-8… up-to-date
Generation complete.~$ echo “LANG=ja_JP.UTF-8” | sudo tee /etc/default/locale
LANG=ja_JP.UTF-8
確認
~$ date
Tue Jan 5 14:24:29 JST 2016
キーボードを日本語配列に
sshでログインしている場合は関係ないですが、直にキーボードをつないだ場合には英語キー配列になっているので
~$ cat /etc/default/keyboard
# Check /usr/share/doc/keyboard-configuration/README.Debian for
# documentation on what to do after having modified this file.# The following variables describe your keyboard and can have the same
# values as the XkbModel, XkbLayout, XkbVariant and XkbOptions options
# in /etc/X11/xorg.conf.XKBMODEL=”pc105″
XKBLAYOUT=”us”
XKBVARIANT=””
XKBOPTIONS=””# If you don’t want to use the XKB layout on the console, you can
# specify an alternative keymap. Make sure it will be accessible
# before /usr is mounted.
# KMAP=/etc/console-setup/defkeymap.kmap.gz
のusをjpに変更
~$ sudo dpkg-reconfigure -f noninteractive keyboard-configuration
update-initramfs: deferring update (trigger activated)
Processing triggers for initramfs-tools (0.103ubuntu4.2) …
update-initramfs: Generating /boot/initrd.img-3.18.0-25-rpi2
flash-kernel: installing version 3.18.0-25-rpi2
flash-kernel: copying /boot/vmlinuz-3.18.0-25-rpi2 to /boot/firmware/kernel7.img
flash-kernel: copying /boot/initrd.img-3.18.0-25-rpi2 to /boot/firmware/initrd7.img
時間の自動合わせ
ラズパイにはRTCが搭載されていないので時間が大幅に狂う可能性がある。
時刻サーバーを利用して時間の自動合わせをします。
~$ sudo apt-get install ntp
Reading package lists… Done
Building dependency tree
Reading state information… Done
The following extra packages will be installed:
libopts25
Suggested packages:
ntp-doc
The following NEW packages will be installed:
libopts25 ntp
0 upgraded, 2 newly installed, 0 to remove and 0 not upgraded.
Need to get 421 kB of archives.
After this operation, 1204 kB of additional disk space will be used.
Do you want to continue? [Y/n] y
Get:1 http://ports.ubuntu.com/ trusty/main libopts25 armhf 1:5.18-2ubuntu2 [49.4 kB]
Get:2 http://ports.ubuntu.com/ trusty-updates/main ntp armhf 1:4.2.6.p5+dfsg-3ubuntu2.14.04.6 [372 kB]
Fetched 421 kB in 2s (147 kB/s)
Selecting previously unselected package libopts25:armhf.
(Reading database … 26818 files and directories currently installed.)
Preparing to unpack …/libopts25_1%3a5.18-2ubuntu2_armhf.deb …
Unpacking libopts25:armhf (1:5.18-2ubuntu2) …
Selecting previously unselected package ntp.
Preparing to unpack …/ntp_1%3a4.2.6.p5+dfsg-3ubuntu2.14.04.6_armhf.deb …
Unpacking ntp (1:4.2.6.p5+dfsg-3ubuntu2.14.04.6) …
Processing triggers for man-db (2.6.7.1-1ubuntu1) …
Processing triggers for ureadahead (0.100.0-16) …
ureadahead will be reprofiled on next reboot
Setting up libopts25:armhf (1:5.18-2ubuntu2) …
Setting up ntp (1:4.2.6.p5+dfsg-3ubuntu2.14.04.6) …
* Starting NTP server ntpd [ OK ]
Processing triggers for libc-bin (2.19-0ubuntu6.6) …
Processing triggers for ureadahead (0.100.0-16) …
このままでもOKだが時刻合わせ用のサーバーを国内のものに変更
sudo vim /etc/ntp.conf
のserverで始まる行をコメントアウトし代わりに
server ntp.nict.jp
を追記する。
~$ sudo service ntp restart
* Stopping NTP server ntpd [ OK ]
* Starting NTP server ntpd [ OK ]
Webサーバー構築
今回はサーバーが非力なのでできるだけ高速にwwwを配信できるようにnginxを使用します。
(nginxは初めて利用するので間違った記載があったらごめんなさい)
~$ sudo apt-get install nginx
Reading package lists… Done
Building dependency tree
Reading state information… Done
The following extra packages will be installed:
fontconfig-config fonts-dejavu-core libfontconfig1 libfreetype6 libgd3
libjbig0 libjpeg-turbo8 libjpeg8 libtiff5 libvpx1 libxpm4 libxslt1.1
nginx-common nginx-core
Suggested packages:
libgd-tools fcgiwrap nginx-doc
The following NEW packages will be installed:
fontconfig-config fonts-dejavu-core libfontconfig1 libfreetype6 libgd3
libjbig0 libjpeg-turbo8 libjpeg8 libtiff5 libvpx1 libxpm4 libxslt1.1 nginx
nginx-common nginx-core
0 upgraded, 15 newly installed, 0 to remove and 0 not upgraded.
Need to get 3060 kB of archives.
After this operation, 9160 kB of additional disk space will be used.
Do you want to continue? [Y/n] y
Get:1 http://ports.ubuntu.com/ trusty/main fonts-dejavu-core all 2.34-1ubuntu1 [1024 kB]
Get:2 http://ports.ubuntu.com/ trusty-updates/main fontconfig-config all 2.11.0-0ubuntu4.1 [47.4 kB]
Get:3 http://ports.ubuntu.com/ trusty-updates/main libfreetype6 armhf 2.5.2-1ubuntu2.5 [253 kB]
Get:4 http://ports.ubuntu.com/ trusty-updates/main libfontconfig1 armhf 2.11.0-0ubuntu4.1 [107 kB]
Get:5 http://ports.ubuntu.com/ trusty/main libjpeg-turbo8 armhf 1.3.0-0ubuntu2 [85.2 kB]
Get:6 http://ports.ubuntu.com/ trusty/main libjpeg8 armhf 8c-2ubuntu8 [2202 B]
Get:7 http://ports.ubuntu.com/ trusty-updates/main libjbig0 armhf 2.0-2ubuntu4.1 [23.3 kB]
Get:8 http://ports.ubuntu.com/ trusty-updates/main libtiff5 armhf 4.0.3-7ubuntu0.3 [129 kB]
Get:9 http://ports.ubuntu.com/ trusty/main libvpx1 armhf 1.3.0-2 [797 kB]
Get:10 http://ports.ubuntu.com/ trusty/main libxpm4 armhf 1:3.5.10-1 [32.1 kB]
Get:11 http://ports.ubuntu.com/ trusty/main libgd3 armhf 2.1.0-3 [123 kB]
Get:12 http://ports.ubuntu.com/ trusty/main libxslt1.1 armhf 1.1.28-2build1 [128 kB]
Get:13 http://ports.ubuntu.com/ trusty-updates/main nginx-common all 1.4.6-1ubuntu3.3 [18.1 kB]
Get:14 http://ports.ubuntu.com/ trusty-updates/main nginx-core armhf 1.4.6-1ubuntu3.3 [285 kB]
Get:15 http://ports.ubuntu.com/ trusty-updates/main nginx all 1.4.6-1ubuntu3.3 [5452 B]
Fetched 3060 kB in 14s (217 kB/s)
Selecting previously unselected package fonts-dejavu-core.
(Reading database … 26861 files and directories currently installed.)
Preparing to unpack …/fonts-dejavu-core_2.34-1ubuntu1_all.deb …
Unpacking fonts-dejavu-core (2.34-1ubuntu1) …
Selecting previously unselected package fontconfig-config.
Preparing to unpack …/fontconfig-config_2.11.0-0ubuntu4.1_all.deb …
Unpacking fontconfig-config (2.11.0-0ubuntu4.1) …
Selecting previously unselected package libfreetype6:armhf.
Preparing to unpack …/libfreetype6_2.5.2-1ubuntu2.5_armhf.deb …
Unpacking libfreetype6:armhf (2.5.2-1ubuntu2.5) …
Selecting previously unselected package libfontconfig1:armhf.
Preparing to unpack …/libfontconfig1_2.11.0-0ubuntu4.1_armhf.deb …
Unpacking libfontconfig1:armhf (2.11.0-0ubuntu4.1) …
Selecting previously unselected package libjpeg-turbo8:armhf.
Preparing to unpack …/libjpeg-turbo8_1.3.0-0ubuntu2_armhf.deb …
Unpacking libjpeg-turbo8:armhf (1.3.0-0ubuntu2) …
Selecting previously unselected package libjpeg8:armhf.
Preparing to unpack …/libjpeg8_8c-2ubuntu8_armhf.deb …
Unpacking libjpeg8:armhf (8c-2ubuntu8) …
Selecting previously unselected package libjbig0:armhf.
Preparing to unpack …/libjbig0_2.0-2ubuntu4.1_armhf.deb …
Unpacking libjbig0:armhf (2.0-2ubuntu4.1) …
Selecting previously unselected package libtiff5:armhf.
Preparing to unpack …/libtiff5_4.0.3-7ubuntu0.3_armhf.deb …
Unpacking libtiff5:armhf (4.0.3-7ubuntu0.3) …
Selecting previously unselected package libvpx1:armhf.
Preparing to unpack …/libvpx1_1.3.0-2_armhf.deb …
Unpacking libvpx1:armhf (1.3.0-2) …
Selecting previously unselected package libxpm4:armhf.
Preparing to unpack …/libxpm4_1%3a3.5.10-1_armhf.deb …
Unpacking libxpm4:armhf (1:3.5.10-1) …
Selecting previously unselected package libgd3:armhf.
Preparing to unpack …/libgd3_2.1.0-3_armhf.deb …
Unpacking libgd3:armhf (2.1.0-3) …
Selecting previously unselected package libxslt1.1:armhf.
Preparing to unpack …/libxslt1.1_1.1.28-2build1_armhf.deb …
Unpacking libxslt1.1:armhf (1.1.28-2build1) …
Selecting previously unselected package nginx-common.
Preparing to unpack …/nginx-common_1.4.6-1ubuntu3.3_all.deb …
Unpacking nginx-common (1.4.6-1ubuntu3.3) …
Selecting previously unselected package nginx-core.
Preparing to unpack …/nginx-core_1.4.6-1ubuntu3.3_armhf.deb …
Unpacking nginx-core (1.4.6-1ubuntu3.3) …
Selecting previously unselected package nginx.
Preparing to unpack …/nginx_1.4.6-1ubuntu3.3_all.deb …
Unpacking nginx (1.4.6-1ubuntu3.3) …
Processing triggers for man-db (2.6.7.1-1ubuntu1) …
Processing triggers for ufw (0.34~rc-0ubuntu2) …
Processing triggers for ureadahead (0.100.0-16) …
Setting up fonts-dejavu-core (2.34-1ubuntu1) …
Setting up fontconfig-config (2.11.0-0ubuntu4.1) …
Setting up libfreetype6:armhf (2.5.2-1ubuntu2.5) …
Setting up libfontconfig1:armhf (2.11.0-0ubuntu4.1) …
Setting up libjpeg-turbo8:armhf (1.3.0-0ubuntu2) …
Setting up libjpeg8:armhf (8c-2ubuntu8) …
Setting up libjbig0:armhf (2.0-2ubuntu4.1) …
Setting up libtiff5:armhf (4.0.3-7ubuntu0.3) …
Setting up libvpx1:armhf (1.3.0-2) …
Setting up libxpm4:armhf (1:3.5.10-1) …
Setting up libgd3:armhf (2.1.0-3) …
Setting up libxslt1.1:armhf (1.1.28-2build1) …
Setting up nginx-common (1.4.6-1ubuntu3.3) …
Processing triggers for ufw (0.34~rc-0ubuntu2) …
Processing triggers for ureadahead (0.100.0-16) …
Setting up nginx-core (1.4.6-1ubuntu3.3) …
Setting up nginx (1.4.6-1ubuntu3.3) …
Processing triggers for libc-bin (2.19-0ubuntu6.6) …
nginxをスタートして確認
~$ sudo service nginx start
ブラウザにraspberrypi2のアドレスを入れて動作確認
ここで一発
~$ sudo apt-get install sysv-rc-conf
を入れておく。
chkconfigの代わりになるのと
~$ sudo sysv-rc-conf
とすることで一覧表示&変更ができるようになります。
php+mysqlのインストール
~$ sudo apt-get install php5 mysql-server php5-fpm php5-mysql
Reading package lists… Done
Building dependency tree
Reading state information… Done
The following extra packages will be installed:
libaio1 libdbd-mysql-perl libdbi-perl libhtml-template-perl libmysqlclient18
mysql-client-5.5 mysql-client-core-5.5 mysql-common mysql-server-5.5
mysql-server-core-5.5 php5-common php5-json
Suggested packages:
libclone-perl libmldbm-perl libnet-daemon-perl libplrpc-perl
libsql-statement-perl libipc-sharedcache-perl tinyca mailx php5-user-cache
php-pear
The following NEW packages will be installed:
libaio1 libdbd-mysql-perl libdbi-perl libhtml-template-perl libmysqlclient18
mysql-client-5.5 mysql-client-core-5.5 mysql-common mysql-server
mysql-server-5.5 mysql-server-core-5.5 php5 php5-common php5-fpm php5-json
php5-mysql
0 upgraded, 16 newly installed, 0 to remove and 0 not upgraded.
Need to get 11.1 MB of archives.
After this operation, 93.7 MB of additional disk space will be used.
Do you want to continue? [Y/n] y
:
省略
:
php5-fpm stop/waiting
php5-fpm start/running, process 8922
途中mysqlのrootパスを聞かれるので設定。
~$ sudo vim /etc/php5/fpm/php.ini
私の場合はwordpressで写真などもアップロードするので
upload_max_filesize
post_max_size
をともに32Mにしました。
~$ sudo vim /etc/php5/fpm/pool.d/www.conf
コメントアウトし32Mを64Mに
php_admin_value[memory_limit] = 64M
~$ sudo vim /etc/nginx/sites-enabled/default
既存の設定をすべてコメントアウトし
追記
server{
listen 80;
server_name www.k2-y.com;
access_log /var/log/nginx;
index index.php index.html index.htm;
root /usr/share/nginx/html;
try_files $uri $uri/ /index.php?q=$uri&$args;
location ~ \.php$ {
root /usr/share/nginx/html;
fastcgi_pass unix:/var/run/php5-fpm.sock;
fastcgi_index index.php;
fastcgi_param SCRIPT_FILENAME /usr/share/nginx/html;
include fastcgi_params;
}
}
wordpressのデータの移行
私の場合は既存のシステムからの移行になるので、移行元のデータをバックアップしリストア。
WordPressの本体ファイルを丸ごとコピーした。
バックアップ(データベースのダンプ)
移行元(旧サーバー)
mysqldump -u wordpressのDBユーザー名 -p wordpressのDB名 > ダンプファイル名
Enter password:
移行先(RaspberryPi)
mysql> create database dbname default character set utf8;
Query OK, 1 row affected (0.02 sec)
mysql> grant all on dbname.* to dbuser@localhost identified by ‘passwowd’;
Query OK, 0 rows affected (0.00 sec)
mysql> flush privileges;
Query OK, 0 rows affected (0.00 sec)
移行元でバックアップしたファイルを流し込む
~$ mysql -u dbuser -p dbname < ダンプファイル名
Enter password:
新規にインストールする方は、新しいシステムにWordPoress用のDBを作成し、WordPressのインストールマニュアルに従ってやれば簡単にできるかと思います。
vsftpインストール
あると便利なのでftpサーバーをインストール
~$ sudo apt-get install vsftpd
[sudo] password for ubuntu:
パッケージリストを読み込んでいます… 完了
依存関係ツリーを作成しています
状態情報を読み取っています… 完了
以下のパッケージが新たにインストールされます:
vsftpd
アップグレード: 0 個、新規インストール: 1 個、削除: 0 個、保留: 0 個。
99.8 kB のアーカイブを取得する必要があります。
この操作後に追加で 298 kB のディスク容量が消費されます。
:
省略
:
vsftpd (3.0.2-1ubuntu2.14.04.1) を設定しています …
vsftpd start/running, process 1317
Processing triggers for ureadahead (0.100.0-16) …
ログインパスワードを変更
ネットにサーバを公開するので初期パスワードを変更しておきましょう。
~$ sudo passwd ubuntu
Enter new UNIX password: あたらしいパスワード
Retype new UNIX password: あたらしいパスワード
passwd: password updated successfully
一旦公開
WordPressが使えるようになったのでRaspberryPiでhttpを配信してみることにします。
多少重い思うがまずまずのレスポンスかなと思います。
2016/1/6よりRaspberryPiで自宅サーバー運用してます。
ちなみに電源はNexus7 2012に付属していた充電用の2AのものをUPSにつないでます。
ToDo
- webページの高速化
- メールサーバーの設定
